Transferring Ringtones From iPhone To iPhone: 5 Easy Ways
Switching to a new iPhone is usually a smooth process. Your apps, photos, messages—all of it transfers with a few taps. But there’s one thing that can slip through the cracks: ringtones. If you’ve created custom tones or downloaded special ones, you might notice they don’t automatically follow you to your new device.

The good news? You can transfer ringtones from one iPhone to another. It just takes a few extra steps, depending on how the ringtone was originally added.
Here’s how to make sure your custom sounds come along for the ride.
Option 1: Use iCloud (If the Ringtone Was Purchased from iTunes)
If you bought your ringtone from the iTunes Store, Apple makes it easy to re-download it—no cables or computers required.
Steps:
- Open the Settings app on your new iPhone
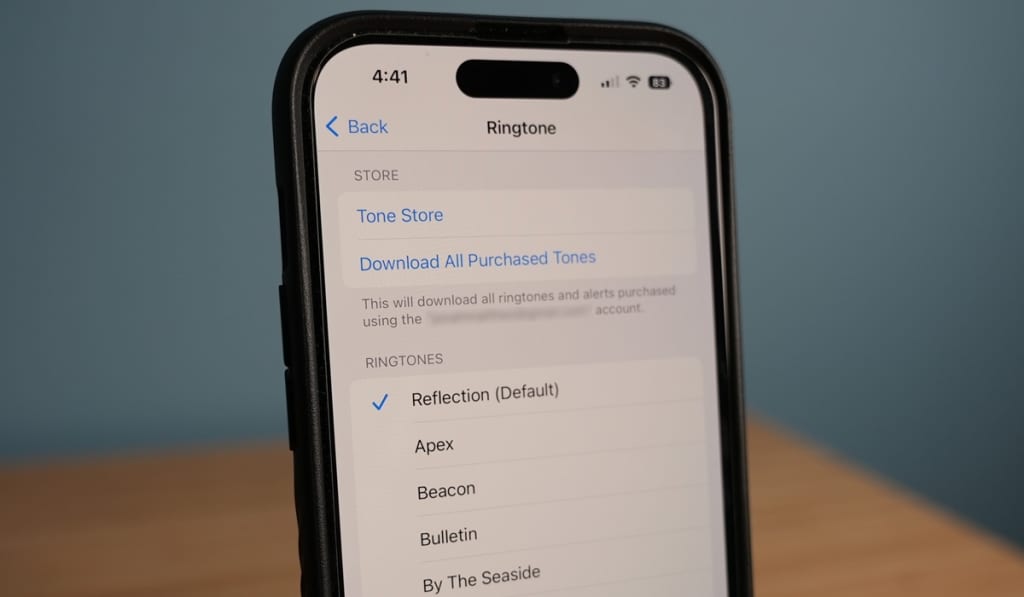
- Tap Sounds & Haptics
- Tap Ringtone
- Scroll to the top and tap Download All Purchased Tones
Any ringtones you’ve purchased with your Apple ID will show up and can be re-downloaded for free.
Note: This only works for tones bought from the iTunes Store—not custom ones made with GarageBand or downloaded from other sources.
Option 2: Transfer via AirDrop (For Custom Ringtones)
Got a custom ringtone? Maybe you made it with GarageBand or imported it through iTunes. In that case, you’ll need to move the actual ringtone file (.m4r) to your new iPhone.
Unfortunately, AirDrop alone won’t install the tone as a ringtone—you’ll need to go through a computer. Here’s how.

Option 3: Use a Computer and Finder (or iTunes)
This method works for both Windows and Mac. It’s the most reliable way to move custom .m4r ringtone files between iPhones.
What You Need:
- A computer with Finder (macOS Catalina or later) or iTunes (Windows or macOS Mojave and earlier)
- A Lightning cable
Step-by-Step:
- Get the Ringtone File
- If you’re moving from an old iPhone, use Finder/iTunes to back up or drag the ringtone file to your desktop.
- You’ll need a
.m4rfile format (Apple’s standard for ringtones).
- Connect Your New iPhone
- Plug it into your computer using a Lightning cable.
- Open Finder or iTunes
- Select your iPhone from the sidebar.
- Drag and Drop
- Simply drag the
.m4rfile into the “Tones” section under your iPhone’s name. - Sync your device if needed.
- Simply drag the
- Set Your Ringtone
- On your iPhone, go to Settings > Sounds & Haptics > Ringtone
- Your custom tone should appear in the list.
That’s it—you’ve officially moved your custom ringtone.
Option 4: Use GarageBand on iPhone (No Computer Needed)
Want to keep everything on-device? You can use the GarageBand app to turn audio files into ringtones—even on your new iPhone.
How it Works:
- Install GarageBand from the App Store
- Open the app and choose Audio Recorder
- Import your audio clip
- Tap the arrow icon > My Songs to save it
- Tap and hold the file, then tap Share > Ringtone
- Give it a name and tap Export
Once it’s done, you’ll get the option to set it as your ringtone immediately. You can also find it later in your settings.
What Doesn’t Work
- AirDrop alone: You can send the file, but the other iPhone won’t automatically recognize it as a ringtone.
- Email or cloud storage: Again, you can move the file, but it won’t install unless you use GarageBand or a computer.
- Bluetooth transfer: iPhones don’t support sending files over Bluetooth like Android phones do.
Final Thoughts
Ringtones may not be the most critical thing to move to a new phone—but if you’ve spent time finding or creating the perfect one, it’s worth keeping. The best approach depends on the source: iTunes purchases are easy, custom tones take a little work, and GarageBand offers a no-computer option for creative users.
Either way, your custom sound doesn’t have to stay stuck on your old device. It just takes a few taps (or clicks) to bring it with you.
iPhone Articles To Keep Reading
- How To Restart An iPhone 14: A Simple Guide For Quick Troubleshooting
- Why Is My iPhone Alarm So Quiet?
- Ways To Get Your iPhone To Stop Scrolling By Itself
- Why Is My iPhone Keyboard Split In Half? How-To Quickly Fix A Split Keyboard!
- Fix The Last Line No Longer Available Error On iPhone 13 And 14 With Confidence
As of 2025, these methods DO NOT WORK. The statement “where the files are stored” is unhelpful. Apple requires Garage Band to be used in a convoluted process of transferring sound files to ringtones. Air Drop and email DO NOT WORK AT ALL.
Thanks for letting us know. This article has now been updated and rewritten as of 5.6.2025.